Friday, October 30, 2009

**APPLE PIE TART**

After visiting with my mom on the phone this morning, we both decided we had a major case of "need to spend a day together"... so I loaded my tote full of cookbooks and goodies and loaded my car with kids and off we drove, over the river and thru the woods (to Grandmother's house we go!) Of course, I brought my SKOOKIES!!!! Mom and I put our heads together and created this recipe for the skookies... Can I tell you that the heavens are singing loudly!!!! First we got the kids together and had them use the apple peeler/corer/slicer to peel/core/slice the apples. That's a good activity for the little kidlets.


First:
6 small apples, cored/peeled/sliced
dash of lemon juice
1 tsp cinnamon
1/2 tsp nutmeg
1/4 cup brown sugar
1 Tablespoon flour for thickening


Mix this together in a bowl and set aside...

When I make any sort of dessert I like to grease the pan well to assure that it'll come off the pan without sticking.

Now either make your own pie crust or buy some pre-made crusts, whatever you prefer.


The pie crust recipe I use is:

2 cups flour
1/2tsp salt
2/3 cup butter flavored crisco

Mix well with pastry blender or cut with two knives. Sometimes I improvise and use a wire whisk and just mix it until it's all crumbly.
Then add about 8 Tablespoons of cold water and mix with your hands. It should be just a little sticky but not wet. If it is wet, just add a little flour. Don't overmix or your pie crust will be tough.


Now this was more than I needed so you could probably cut the recipe in half, but I had a better idea which I'll share later...:-)


Now roll two 8" circles about 1/8-1/4 inch thick and put in your well-greased skookie. It should hang over the edges about 2 inches all the way around. If it's not perfect, no worries, mine wasn't either :-)


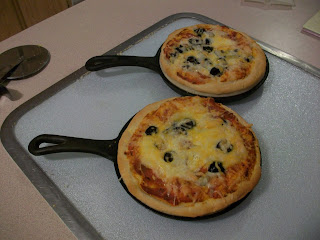
Now put half of your filling in each skookie on the pie crust. Now just fold the crust up over the filling about 2 inches around and just fold and pinch it together...(refer to pic)


Put a tablespoon of butter in the center.


Place in oven at 425 for 30 minutes...

Take out and ENJOY!

With the remaining crust, I rolled it out into (2) 6-inch circles, placed them on the greased skookie pans and sprinkled them with cinnamon and sugar and put it in the oven at 425 for about 10 minutes or so until it was golden brown and all puffy... soooooo good!!! This is a spectacular treat for the kids!
*****DON'T FORGET TO LEAVE YOUR COMMENT FOR YOUR CHANCE TO WIN A FREE SET OF SKOOKIE PANS*****
Happy Cooking!
*Teauna*

Wednesday, October 28, 2009

**BANANA CUPCAKES WITH CINNAMON CREAM CHEESE FROSTING**


Well, I had some extremely ripe bananas that I needed to get used up! I like to try new things so this is the recipe I found! These cupcakes are very moist and the frosting is just the perfect touch!


1 box plain yellow cake mix

1 1/2 cups mashed bananas, from 3 medium or 4 small bananas

1/2 cup water

1/2 vegetable oil

3 large eggs

1 teaspoon ground cinnamon


Preheat oven to 350. Place 24 paper liners in cupcake pan. If you don't have liners, lightly mist the pan with PAM and dust with flour, removing all excess flour.

Place the cake mix, mashed bananas, water, oil, eggs and cinnamon in a large mixing bowl. Blend 2 minutes until batter looks thick and well combined. Fill cups 3/4 of the way full.

Bake cupcakes until they are golden brown and spring back when lightly pressed with your finger, about 20-24 minutes. Remove the pans from the oven and place them on wire racks to cool for 5 minutes. Remove cupcakes from pan and place on wire racks to cool for 15 minutes before frosting...


For the frosting:

8 oz pkg cream cheese at room temperature

4 T butter at room temperature

3 cups powdered sugar

1 teaspoon ground cinnamon


Place the cream cheese and butter in a large mixing bowl. Blend with an electric mixer until combined. Add powedered sugar a little at a time, blending with the mixer on low speed until the sugar is well incorporated. Add the cinnamon, the beat at medium speed until fluffy.

These cupcakes can be sotred in a cake saver or under a glass dome at room temperature for up to 3 days or in the refrigerator for up to 1 week. Or freeze them, wrapped in aluminum foil or in a cake saver, for up to 6 months. Thaw the cupcakes overnight in the refrigerator before serving.


Happy Cooking


*Teauna*

Tuesday, October 27, 2009

**Garlic-Cheesy Biscuits**


I wanted to make something different to go with my soup last night and I had no eggs. So this is what I came up with! They were a hit! This recipe makes 24 biscuits so you could freeze the left-overs if you can't eat them all! :-)


4 cups bisquick

1 cup shredded cheese (I used 1/2 cup cheddar and 1/2 cup mozzarella)

1 1/3 cups milk

1/4 cup butter, melted

1 tsp garlic salt


First combine bisquick an cheese in a large mixing bowl. Add milk and stir until just moistened. Don't overmix! Place tablespoons of dough on lightly greased cookie sheet. Bake at 450 for 8-10 minutes or until golden brown. Mix butter and garlic salt together and use pastry brush to spread on top of hot biscuits.


Happy Cooking!


*Teauna*

Sunday, October 25, 2009

**OATMEAL APPLESAUCE COOKIES**


The kids and I have been juicing apples and making applesauce this weekend. We had a great neighbor that brought us 2 huge boxes of apples. As we were putting the apples through the strainer, the kids had a BRILLIANT idea! "How about we make applesauce cookies with the fresh applesauce Mom!".So, we did! I have made this recipe since I was a little girl in my Mom's kitchen. It always feels good when I'm able to make them in my kitchen with my kids! These cookies stay moist and yummy for quite a while as long as you keep them in an airtight container. They also freeze well! FYI: because these cookies are so moist, you will want to put wax or parchment paper between layers of cookies in an airtight container so they do not stick together! :-)

Cream together:
2 cups sugar
1 cup shortening

Add to first mix:
2 eggs
2 cups applesauce
1 tsp soda

Add to above mix:
3 1/2 cups flour, sifted
2 tsp nutmeg
3 tsp cinnamon
1 tsp salt
2 cups oatmeal

Add to above:
1 cup chopped nuts
1 cup chocolate chips (I like using mini semi-sweet chocolate chips)
Can add 1 cup uncooked raisins if desired

Bake at 375 for 12 minutes on lightly greased cookie sheets...

Happy Cooking
*Teauna*

Friday, October 23, 2009

**FUDGE JUMBLES**


These are one of my favorite treats and are requested OFTEN by friends and family alike. I do believe they are the most requested recipe from my Hubby and kids. This recipe makes a full cookie sheet and they are absolutely perfect for a pot-luck or that 'special treat' at a family party. Once you take them, they'll request them again and again.... Make sure to store them in an airtight container and they'll stay soft! MMMMM......mmmmmm........Good!


Mix together:

1 cup margarine

2 cups brown sugar

2 eggs

2 teaspoons vanilla

3 cups rolled oats

2 1/2 cups flour

2 teaspoons soda

1 teaspoon salt


Press 2/3 of batter onto greased cookie sheet. Reserve other 1/3....


Then melt together:


1 pkg chocolate chips (your choice**semi sweet are my favorite**)

1 can sweetened condensed milk

2 Tablespoons margarine

2 teaspoons vanilla


I melt this in the microwave in a glass bowl in 30 second increments, stirring in between. It took approximately 1minute and 15seconds. If you feel more comfortable about melting this in a saucepan on the stovetop, go ahead. Then spread filling on top of the dough in the cookie sheet. Now dot the remaining dough on top. Bake at 350 for 25-30 minutes or until golden brown. Let cool then cut and store into an airtight container.


FYI-- when I want to take these to somewhere special I will use 2 cups of the dark cocoa with vanilla buttons from kitchen kneads instead of the regular chocolate chips. You can serve them in smaller servings and they are richer too. LOVE THEM!!!!


Happy Cooking


*Teauna*

Monday, October 19, 2009

**BROWNIES WITH HOMEMADE HOT FUDGE SAUCE **

Once again, it was 'SKOOKIE NIGHT' at our house. I made brownies and homemade hot fudge sauce. This is always a good treat and soooo much cheaper than what you'd pay if you got one at a restaurant.

First prepare your pans. Make sure that they are wiped clean and you can go ahead and spray them with a little non-stick cooking spray for safety sake. :-)

For the brownies:

2 cubes melted or soft butter
2 cups sugar
4 eggs
2 tsp vanilla
1 tsp salt
1 1/2 cups flour
1/2 cup cocoa
1 cup chocolate chips

Cream together butter and sugar. Add eggs and vanilla. Combine salt, flour, & cocoa in a small bowl and add to creamed ingredients. Then stir in chocolate chips. Reserve 1/2 cup batter. Divide remaining batter between four skookie pans. (this recipe works well in a 9x13. Just don't reserve that 1/2 cup batter:-) )
Put in a preheated 350 degree oven and bake for 25 minutes. Remove from oven and set on cooling racks to cool slightly. (If baking in 9x13 pan, bake 30-35 minutes)
**either eat that reserved 1/2 cup of batter (the kids love it!) or just throw it away. If you don't, you'll have a real mess in your oven!**
Serve with vanilla ice cream and homemade hot fudge sauce. (recipe follows)

Homemade hot fudge sauce:

1 1/2 cups sugar
1/2 cup brown sugar
1/4 cup cocoa
1/3 cup flour
1/4 tsp salt
1 can evaporated milk
1 cup water
2 T. butter
2 tsp vanilla

Mix all ingredients well in a saucepan. Cook until thick. Serve warm over brownie and ice cream. Top with whatever fun toppings you choose :-)

Happy Cooking
*Teauna*

Friday, October 16, 2009

**Gooey S'more Bars**


OH MY HEAVENS!!!! I wanted to try something different tonight. Don't you ever get sick of the same ole' cookies? I love s'mores anytime of the year, but it seems it's in the colder months that the fire-roasted marshmallows sound more tempting to me. So after much thought, I decided to try something that would say "S'mores" without starting the fire!
I will tell you that these are very rich! A 9x13 pan should make 3 dz bars. They would be absolutely wonderful served with a scoop of vanilla ice cream for dessert! These would be an amazing treat for a kid's party. This is a very kid -friendly recipe. My kids enjoyed crushing the graham crackers in a gallon-size ziploc bag with a rolling pin. They also like to measure out all the dry ingredients to add to the creamed ingredients.


1 c butter, softened

1 1/2 cups sugar

2 eggs

2 tsp vanilla

2 2/3 cup flour

1 1/2 cup graham cracker crumbs

2 tsp baking powder

1/4 tsp salt

2 cups chocolate chips

7 oz jar marshmallow creme


In a large bowl, cream butter and sugar until light and fluffy. Add eggs and vanilla and beat well. Combine the flour, cracker crumbs, baking powder, and salt; gradually add to creamed mixture. Set aside 1 cup for topping.

Press remaining mixture into a greased 9x13 baking dish. Place chocolate chips over crust; spread with marshmallow creme. (this is hard to spread so I microwaved it for 30 seconds but it will grow so be careful not to make a big mess in your microwave. Don't worry if it isn't perfectly spread because it will heat up and kindof level out when it's cooking) Crumble remaining graham cracker mixture over top.

Bake at 350 for 30-35 minutes or until golden brown. Cool on a wire rack. Cut into bars and store in an airtight container. YIELDS: 3 dz small bars

Happy Cooking!
*Teauna*

Thursday, October 15, 2009

** PERSONAL PAN PIZZAS **

It is 'SKOOKIE NIGHT' at our house tonight!!!! We are making yummy personal pan pizzas! So much fun and so little work and clean-up. Love these kind of meals...and the interaction with the entire family makes it even better!

I LOVE using cast iron for pizza because you don't get the doughy crusts! I don't like ''doughy'' anything! I also have a Camp Chef cast iron Pizza Pan! When we are having 'SKOOKIE NIGHT' and make pizza, I use the Pizza Pan and make breadsticks for our appetizer. But of course, you can use your regular pizza pans if you don't have cast iron:-) However, if you do want to check out this pan or skookies, go to http://www.outdoorcooking.com/ . They carry the full line of Camp Chef prdoucts and they are less expensive there then on the camp chef site. You can find the Skookies at these stores: Smithfield Implement, R&R Hardware, IFA, CAL Ranch, Al's Sporting Goods, or Kitchen Kneads.

My favorite thing about cast iron is that it doesn't wear out! It just gets better with time and use and it can be used both inside and outside for generations and generations! What more could you ask for?

The first thing I do to get ready for our pizza party is prepare the pizza dough... it needs to rise so prepare it an hour and a half or so before you plan on making dinner. Set is aside and while it is rising, prepare all your toppings for your pizzas! Try all different kinds of toppings. You know, it's amazing how kids will try something when they are the ones putting it on their pizza!

For the pizza dough:

1 Tablespoon active dry yeast

1 cup warm water

1/2 teaspoon salt

2 teaspoons oil

2 1/2-3 1/2 cups flour

Dissolve yeast in warm water in warmed bowl. Add salt, oil & 2 1/2 cups flour. Mix well. Add remaining flour and knead. You just want to knead this until it's no longer sticky. I use about 3 cups of flour. Place in greased bowl- cover and let rise until doubled. A good way to tell that your dough has doubled is to poke your finger in the middle of it. If the indentation stays then it is ready.

*I make this in my kitchenaid mixer and let it do all of the work :-), however I have made it the 'old fashioned' way and it's simple. Just don't overthink it. Knead until it's smooth and elastic and you'll be good!*

* I usually double this recipe so I have enough for at least 4 personal pan pizzas and a large pizza pan of breadsticks. If you are using a mixer, just mix one batch at a time then put them in a pan together. They will rise together.*

Now for the pizza sauce:

Mix well together:

1 can tomato sauce

1 can tomato paste

1 Tablespoon oregano

1 clove garlic, minced

1 1/2 tsp basil

1/2 tsp sugar

1/2 tsp onion salt

Prepare and refrigerate until you're ready to put the pizzas together!

Now just prepare the toppings for your pizza! Here are some ideas:

*pepperoni

*canadian bacon

*chopped honey-baked ham

*cooked and rinsed sausage or hamburger

*chopped olives

*pineapple

*shredded cheese

*green peppers

*etc, etc, etc

After your dough has risen, punch it down and make sure your skookie pans are clean and you can lightly grease them if you would like. Once you have used them several times, you should not have to use any grease at all. They are preseasoned but for the first few uses, I would say it's better to be safe than sorry and it does help the seasoning process. :-)


Now take about a baseball size of dough and spread on your skookie pan. Then put on your sauce and your toppings. Bake at 450 degrees for 15-20 minutes or until they are golden brown. Take out of the oven and slide pizza onto a cutting board. Cut and Serve!!!


Like I said, if you double this recipe, you should be able to make 4 individual pizzas with the skookies and a 14inch pan with breadsticks. For the breadsticks, I just pat the dough out on the pizza pan then brush with softened margarine or butter, then sprinkle with parmesan cheese and garlic salt. Bake 20-25 minutes until gold brown. Slice and serve with remaining pizza sauce for a dipping sauce.

I hope you enjoy this as much as we do!


Happy Cooking!

*Teauna*

Tuesday, October 13, 2009

*** FREE CAMP CHEF SKOOKIES ***

I am soooo excited! I have decided to have a giveaway and it's a GOOD one! A CAMP CHEF SKOOKIE SET WITH CHOCOLATE CHIP COOKIE MIX could be yours! So here is the deal: I will continue to do my normal recipes that I have been posting. But at least 2 days a week for the next month, I will post a recipe that can be used with a skookie pan. You can use all these recipes in your pans you have at home too, this will just be a great way to get more ideas and creativity in your kitchen.
Items like these in your kitchen are priceless because you can also use them in your outdoor kitchen too.... and they will last for generations and generations. They are made of cast iron and over time will develop a wonderful finish that makes them easy to cook with and clean. They are pre-seasoned so they already have a nonstick finish but they only get better with time and use!
I have a couple sets of these pans and we love to have "Skookie Night" at our house! It is SO MUCH FUN!
So, this is what I need from you: When you read a post on my blog, leave a comment. Suggest new ideas, give me any suggestions you may have, try the recipes and report back how you liked them, etc. I want to hear from you people! At the end of the month period, I will number the comments and randomly draw a number and the owner of that comment will win the AwEsOmE set of SKOOKIE PANS!
Remember to tell your friends about the drawing for **FREE CAMP CHEF SKOOKIES**.

Can't wait to hear from all of you!

Happy Cooking!
*Teauna*

Sunday, October 11, 2009

MOIST BANANA BREAD


Have I mentioned that I LOVE FALL? Well, I do! I love the fact that the house stays cool enough that I want to bake to warm it up. . . I love that it's hunting season so there's a demand for yummy easy-to-eat-on-the-go snacks. . . and I LOVE that bananas go brown quickly so that they're cheaper in the grocery stores and I can make yummy, moist banana bread! My mom has made this recipe since I can remember and it is so good! I can remember that she used to put chocolate chips on a couple of the loaves right before baking for us to enjoy. The aroma of the banana bread baking is AMAZING! When I bake this, I use the small tin loaves. I like that it bakes evenly and they are the perfect size for lunches, snacking, & freezing as they do freeze very well... if you have any left:-)

Preheat the oven to 350.

Grease and Flour 6 mini loaf pans.

5 lg bananas
4 eggs, well beaten
1 cup shortening
2 cups sugar
2 tsp soda
1 tsp salt
1 cup walnuts
4 cups sifted flour

Beat bananas to a liquid, then add eggs. Cream together shortening and sugar and add to bananas and eggs. Sift together flour, soda and salt mixture into bananas mixture. Add nuts and flour. Divide between the 6 prepared loaf tins. Place in oven on middle rack and bake 45-55 minutes until it bounces back when touched on top. You can sprinkle chocolate chips over the loaves just before baking for an extra special touch!

Enjoy!

Happy Cooking

*Teauna*

Thursday, October 8, 2009

SNICKERDOODLE CHEX MIX


I am a fan of anything with "chex mix" in it's title. I like to have 'healthier' mixes like this lying around for us all to snack on instead of candy. I must say this one is soooo good! I love anything with cinnamon-sugar... mmmmm and popcorn! So try this :-)


1/4 cup sugar

1 teaspoon ground cinnamon

2 cups Chocolate Chex cereal

2 cups Cinnamon Chex cereal

4 cups popped popcorn

1/4 cup butter


In a small bowl, combine sugar and cinnamon; set aside. In a large microwave-safe bowl, combine the cereals and popped popcorn.

In a 1-cup microwave-safe measuring cup, microwave butter on high about 40 seconds or until melted. Pour over cereal mixture; stirring until evenly coated.

Microwave on high, stirring after 1 minute. Sprinkle half the sufar mixture evenly over cereal mixture, stir. Sprinkle with remaining sugar mixture; stir. Microwave mixture for 1 minute longer. Spread on waxed paper or paper towels to cool. Store in an airtight container.


Yield: 16 (1/2 cup) servings.
Happy Cooking
*Teauna*

Tuesday, October 6, 2009

FALL SPICE OATMEAL COOKIES


My kids suggested that I make some oatmeal chocolate chip cookies for them to take hunting with them. Of course, I like to make them "season-worthy" . Because I love the spices that sum up fall I decided to see what I could do with them... This is the recipe I came up with.


Cream Together:

1 cup butter, softened

3/4 cup packed brown sugar

1/2 cup sugar


Add:

1 tsp vanilla

2 eggs


Then add:

2 cups all-purpose flour

1 1/4 tsp baking soda

1 1/2 tsp pumpkin pie spice

2 3/4 cups quick-cooking oats


Then add 1 pkg mini semi-sweet chocolate chips.


Drop by teaspoonfulls on greased cookie sheets. Flatten slightly. Bake at 350 for 10 minutes. Let cool in pan then remove to wire rack. These will stay soft as long as they are stored in an airtight container. If they do start to get hard, place a piece of bread in the container with them and they will soften right back up!


This recipe made 5 dozen with my small cookie scoop!

Monday, October 5, 2009

RAISED MEATBALLS


It is sooo cold outside so it's time for cozy comfort food! I enjoy making a good meal on a low budget. Of course, a good meal consists of meat and potatoes, and of course a veggie, at my house! So tonight I decided to make the good ole' *Raised Meatballs*... They are tasty and fit right into my budget with mashed potatoes and corn. This costs approximately $7.00 for the whole meal.

*Prepare to get your hands dirty!* :-)

First take 1 lb of thawed hamburger and break it up in a large mixing bowl... Tear apart 3 slices of bread into small pieces and add to hamburger. Then add 2 teaspoons of baking powder, 2 beaten eggs, 1/2 cup milk, 1 teaspoon salt & 1/4 teaspoon pepper. You can also add minced onions if you would like.

Mix all of this well together and form into balls. I like to use a 1/2 cup ice cream scoop so that I have meatballs that are all the same size. I like to know that all of them will cook evenly! Place your meatballs in a greased 9x13 casserole dish.

In a small mixing bowl, mix together 1 can cream of chicken soup, 1 can cream of mushroom soup and 1 cup milk. Mix well and pour over the meatballs.

Bake in a 350 degree oven for 1 1/2 hours.

Remove the meatballs and place in a serving bowl and take the sauce and use it as your gravy for your mashed potatoes.


This should make approximately 6-8 meatballs and should serve 4 people.

Enjoy!

Happy Cooking

*Teauna*

Thursday, October 1, 2009

CINNAMON TWISTS


Brrrrrr..... I do believe it's freezin' season! And when it's cold outside, I really get to baking! So I made some cinnamon twists today. They are a project that isn't real quick to make but man are they ever worth the wait once you're done! This is a recipe I have used for a really long time. I always triple the recipe so I am able to make 1 cookie sheet full of cinnamon twists and 1 9x13 pan of cinnamon rolls to take to my in-laws...


1 tablespoon active dry yeast
1/2 cup warm water
1/2 cup lukewarm milk (scalded then cooled)
1/3 cup sugar
1/3 cup shortening, margarine or butter, softened
1 teaspoon salt
1 egg
3-1/2 to 4 cups all- purpose flour

Begin by dissolving active dry yeast into warm water. On your stovetop, scald milk. Let it cool, then add it to your water and yeast mixture. Then add sugar, shortening, salt, egg and 2 cups of the flour. Beat until smooth. Mix in enough remaining flour to make dough easy to handle.

Turn dough onto lightly floured surface; knead until smooth and elastic, about 5 minutes. Place in greased bowl; turn greased side up. Cover; let rise in warm place until double, about 1-1/2 hours. You know that the dough is ready if you push your finger in the center and the indentation remains.

Punch down dough. Roll into a rectangle. Split this rectangle into imaginary thirds as you will be able to see in the pictures. First cover the middle third with soft butter, then sprinkle cinnamon, sugar, and brown sugar on it. Then pull over one of the outside thirds over the middle and repeat the last step. Then when it is covered go ahead and pull over the other third on top. Now cut 1 to 1-1/2 inch strips then twist and place on a greased pan.


Let rise until doubled. Then bake at 375 for 25-30 minutes or until golden brown.
Frost or glaze with your favorite frosting! I like cream cheese frosting beat until it's fluffy and creamy.

Serve when warm... store in an airtight container once they're cooled to keep soft and moist.

Happy Cooking

*Teauna*